Windows
- 1.Armadillo
Download the latest stable package from the website
arma.sourceforge.net/download.html
After extract, copy the include folder to a convenient directory. We will need this directroy for the cmake file.
Install LAPACK from http://icl.cs.utk.edu/lapack-for-windows/clapack/index.html
Download “blas.lib”, “libf2c.lib” and “lapack.lib”. Remember the directory to the “lapack.lib”
- 2.OpenMP
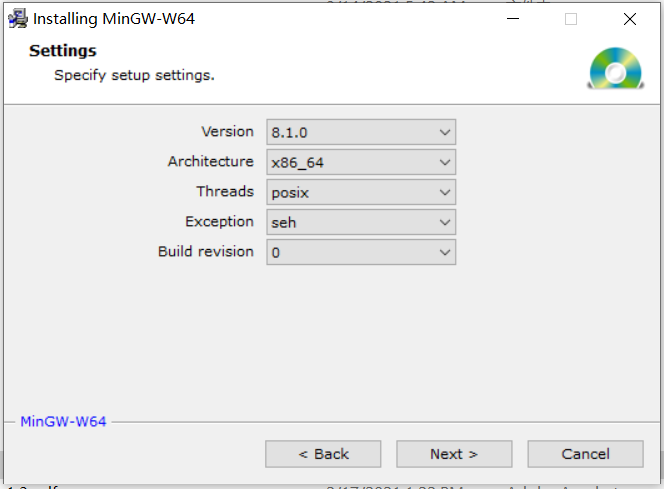
We could build the C++ compiler with MinGW. Please install the Windows 64bit MinGW, otherwise you are likely meet problems when working with Armadillo library. Here is the link
https://sourceforge.net/projects/mingw-w64/
Running the setup file and set the architecture to “x86_64”, also remember the installation directory.
Then go to the installation folder, add the
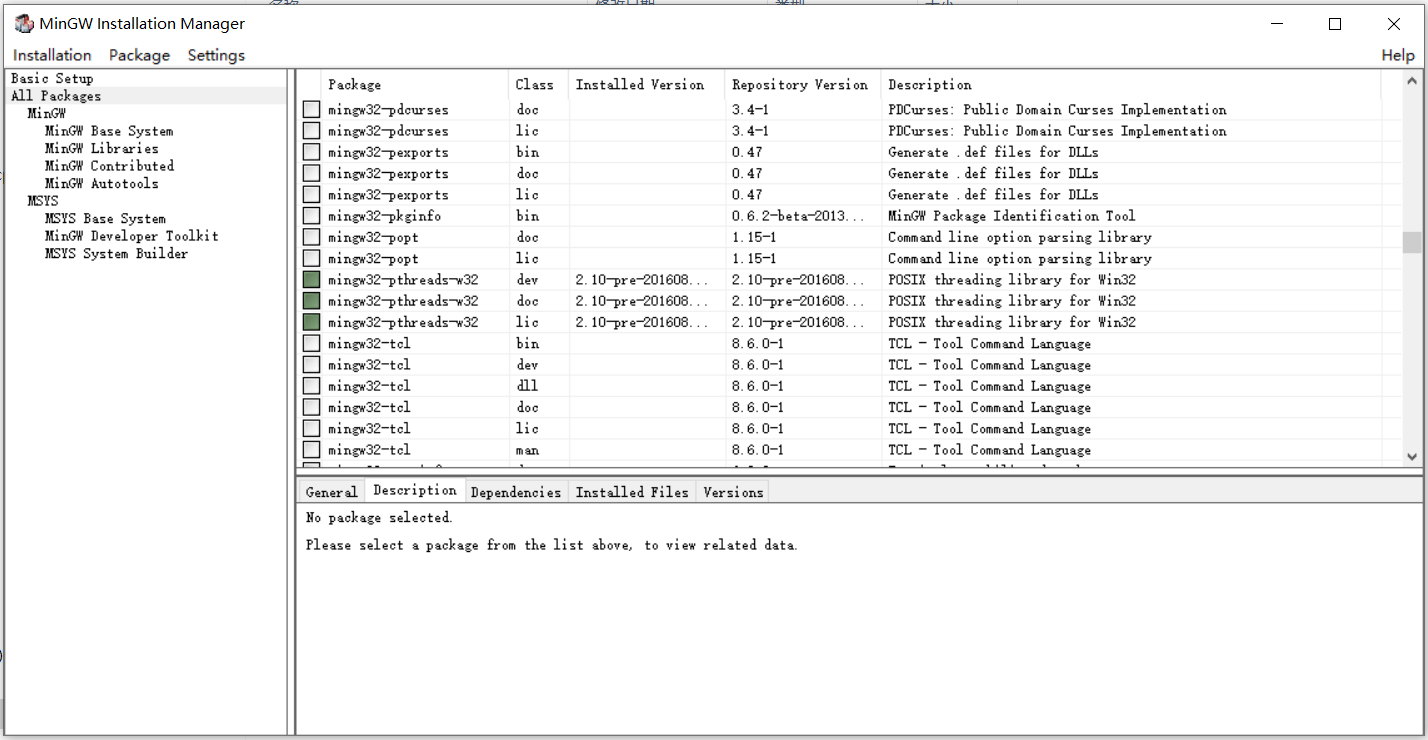
<mingw installation path>\i686-8.1.0-posix-dwarf-rt_v6-rev0/mingw32/includeto the windows environment path. By now, MinGW should have been configurated successfully.MinGW has a package manager which would be convenient to install the libraries and packages. We could setup OpenMP with it.
https://sourceforge.net/projects/mingw/
The installation process is quite straight forward. After installation, you could be able to use “MinGW Installation Manager”. In order to ise OpenMP, we need to install “mingw-pthread” shown as the figure below
- VTK
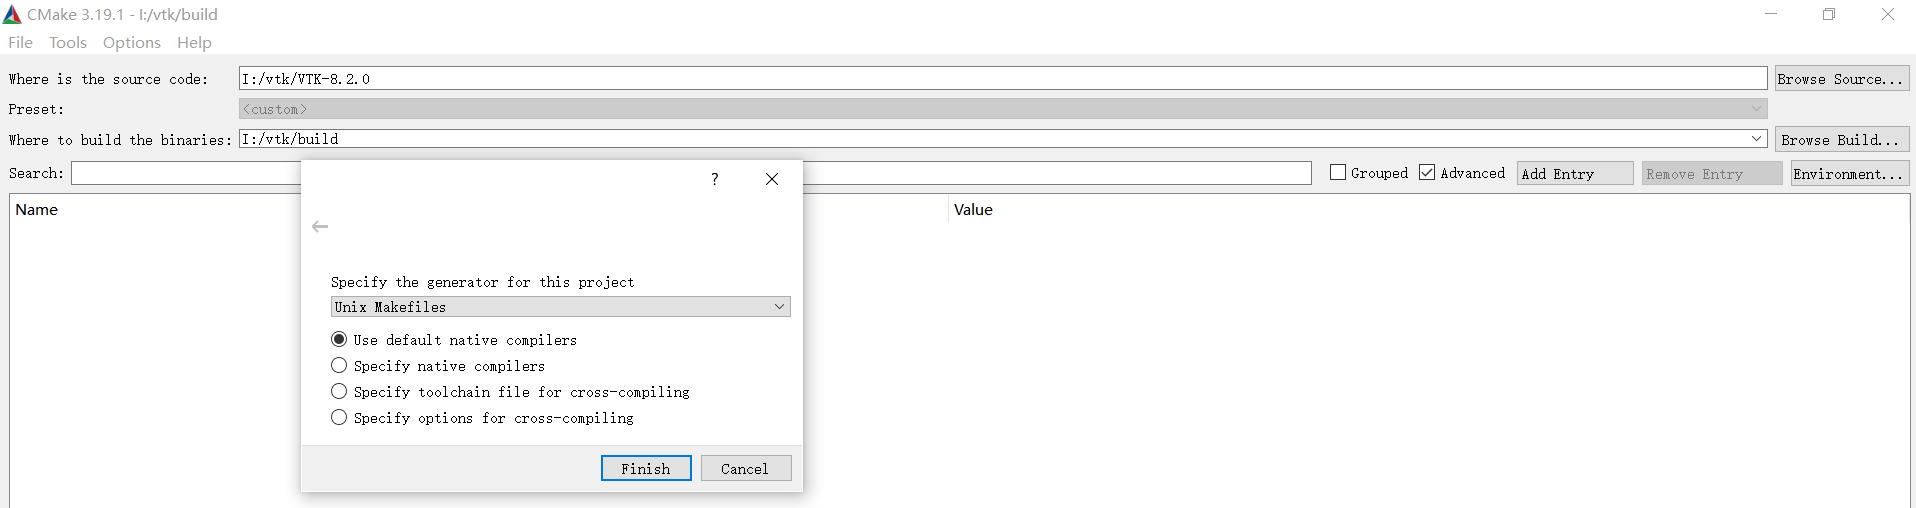
In this step, we need to use the CMake GUI. You could download it from https://cmake.org/download/.
Then, download the VTK package (for example “VTK-8.2.0.zip”) from the link below:
Extract the package, then go to the VTK folder and create new folder named “build”. As the first picture below, select the source directory (VTK) and the build target directory (build). Then by pressing “Configure”, it will ask you to choose the generator (For me, I choose the Unix Makefile. You could choose to use the Visual Studio if you are more comfortable with that).
Here we show how to build the VTK with Unix Makefiles. You could follow the instruction https://www.youtube.com/watch?v=6S3_sl5Sc0E&t=12s to build the VTK with Visual Studio. So by pressing Configure, it brings you to the next picture. You could modify the configuration and press “Configure” to apply the changes (the default setting should be fine to run this application). After the configuration is finished, press “Generate”, the Makefile (or .sln file if you choose to use visual studio) will be generated to the “build” folder. Finally, open the cmd and go to the “build” folder. By using
make, the installation can be finished.

- cmake and compile
Before runing the cmake file, please write the armadillo include directory to the “target_include_directorties”. After that, open the cmd and go to the directroy of the “CmakeLists.txt”. Then
cmake -G "Unix Makefiles"makeThe executable file will be generated to the “Results” folder